Further down the page, below my notes, is my experience with installing and setting up PremiumPress Directory Theme. I will openly admit that I made some huge errors initially, so hopefully my experience with help you avoid similar mistakes.
Other Directory and Membership Themes and Plugins
There are loads of directory and membership WordPress themes available, I have a large list HERE. In choosing a directory theme, I narrowed it down to a few, tried several, and now I am trying another one – PremiumPress Directory Theme. The other themes I tried varied from nice, but not all the features I needed, to confusing and too difficult to customize.
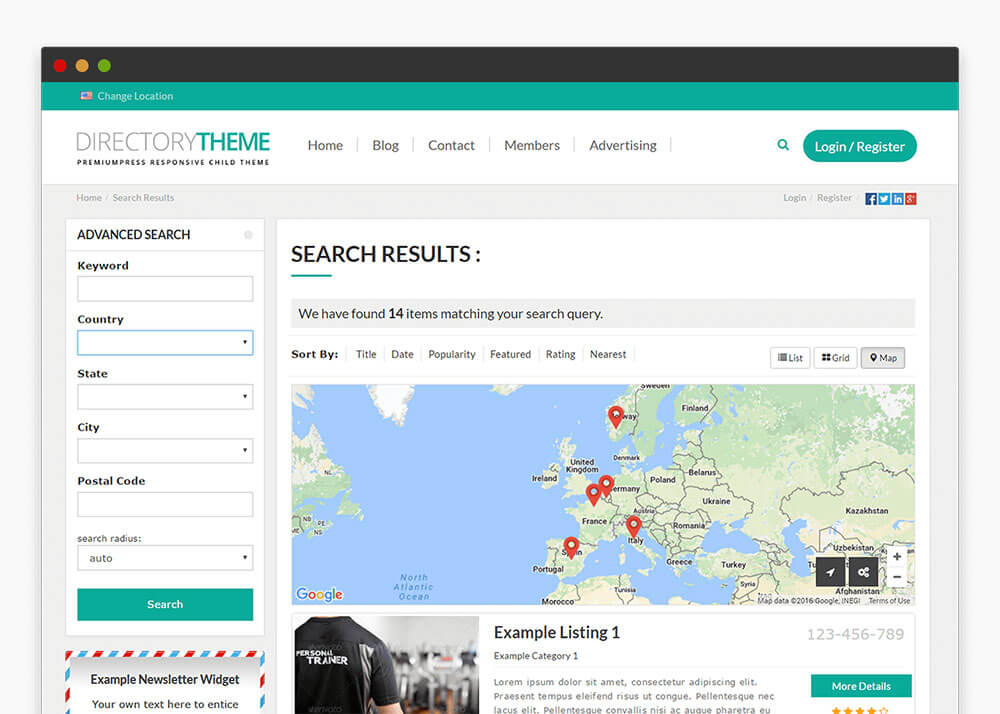
But honestly, one of the biggest factors in my deciding to trying PremiumPress over some other directory programs was the map. With the other directory theme demos I tired, if I entered a location or zip code that did not have any listings at that location, the demo did not return a map, but rather it returned a virtually blank page with something like “no results found”. I thought that was very unprofessional. PremiumPress appears to return a map even if there are no listings for that location, much nicer.
The PremiumPress Directory Theme
Okay, onwards. I bought the full VIP Club bundle version of PremiumPress since they have a refund policy. That way if I liked it, I would have access to everything. If not I could ask for a refund.
To begin, I watched all of the PremiumPress tutorial videos on YouTube. The videos are about 3 minutes to 20 minutes long. I have to say, they are good videos. Not every single detail, which would get long and boring, but plenty of info. I felt the videos covered the important stuff, even pointing out a few of the basic dashboard options for WordPress. However, there are numerous small details that I am still trying to figure out.
The video tutorial are on the PremiumPress website or you can see them at YouTube:
https://www.youtube.com/user/premiumpressvideos/videos
PremiumPress Videos:
My suggested viewing order. You might want to check off videos after they are viewed.
Theme Install
Admin Overview
Design Setup
Page Builder Plugin
Theme Setup
Listing Settings
Listing Packages
Membership Setup
Search Setup
Custom Fields
User Setup
Order Manager
Email Setup
Advertising Setup
Creating Child Themes 1 & 2 (can just use PremiumPress pre-made child themes)
Language Setup (Just skimmed since I do not need this option.)
I could not find a video for Listing Manager.
There are also a couple of short Sales Videos:
Responsive Directory Theme for WordPress
PremiumPress Responsive Themes
Sharing My PremiumPress Notes – There are 3 Sections of Notes.
I want to share my notes with you. These are the things I found important to me. Much of the setup preferences are self-explanatory, but there were a few things that I wanted to remind myself of when I went to finish my website setup.
Perhaps you can print off my notes and then as you view the PremiumPress Video Tutorials, you can add your own notes, because we all see and remember things differently.
#1 My Important General Notes:
#1 – Have a clean install of WordPress and follow the instructions and rules.
#2 – Once the theme is installed and activated, use the “Installation” option in the Dashboard. The installation requires the purchase license key. And I elected to install the sample data.
#3 – Click “Click Here to Continue” button to actually activate theme and install the sample data.
#4 – Watch the PremiumPress videos a first time and then watch the videos a second time.
#5 – If I can not find something, or I am needing help, the option I need is probably there, just review the PremiumPress videos to find it.
#6 – The sample data installs pages and content, but not a menu, that needs to be created.
#7 – Remember when creating a new page to set the page “Attributes”, and remember to assign the page to a template. Theme Setup / General Setup / Page & Button Links.
#8 – There are now two types of Categories, normal WordPress Blog Categories and PremiumPress Listing Categories.
#9 – Listing Packages & Memberships are stand alone options and can be used individually or together. Listings are single use for selling one item or service. Membership are subscriptions and can have a single use or sell multiple “listing” options.
#10 – Membership Packages – Can restriction access to certain pages (this option can found at the bottom of a created page – “Page Access”).
#11 – Custom Fields are available for Advanced Search and Users, to create a unique website.
#12 – Pages are still pages, PremiumPress will install some pages with the sample data, but the pages can be changed, deleted or replaced, such as a new custom Home Page can be created. However, be cautious about deleting or changing pages that function with the theme program.
#13 – Sample data Widgets might need to be deleted and re-installed to customize them.
#14 – Remember when creating Database Keys that most WordPress programs are using PHP coding so variables are case sensitive, and Db keys must start with a letter or underscore character, and contain no special characters, except the underscore character. (Use alpha-numeric and underscores only.)
#15 – To display a full width logo/image at the top of the home page. Theme Setup / General Setup / Top Navigation / Header Layout and select ‘Full Width Logo’.
#16 – To turn off pre-set Home Page Display Blocks. Design Setup / Home Page (your front page design) – Customize.
#17 – Column Layout: Design Setup / Home Page (your front page design) – Settings.
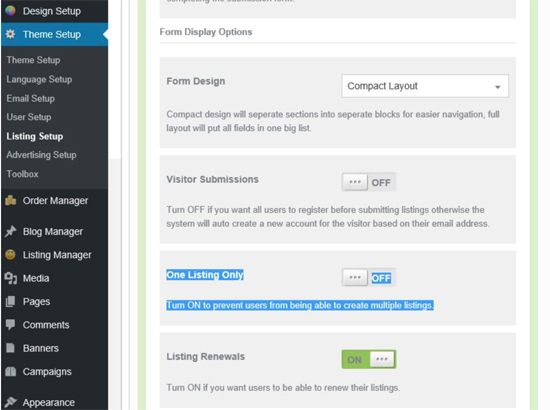
#18 – To keep the Pricing Table visible while working on the website. Theme Setup / Listing Setup / Settings / Listing Setup Option / Form Display Options and turn OFF ‘One Listing Only’. It can be turned back ON later.
#19 – Sizes. Full Page = 1170px. Logo Size = 315 X 90.
Normal = 670px (40% logo / 60% banner). Slider Image 1150 X 410.
#2 My Setup Notes:
My notes are just my notes, and certainly not official, the PremiumPress tutorial videos are good, these are my notes of things to be sure to remember after viewing the videos. If I made an error please let me know, remember, I am also new to this PremiumPress Directory Theme.
PremiumPress Main Tabs:
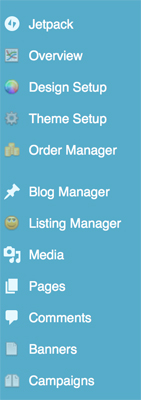
The Directory theme adds new tabs (links) to the left menu area in addition to normal WordPress Dashboard tabs. If using the advertising feature, Banners & Campaigns tabs will also be available.
Overview – Overview and check for Updates
Design Setup – Customize and Child Themes.
Theme Setup – Setup and configure core elements and objects.
Order Manager – Manage orders and payments.
Blog Manager – Normal Blog Posts.
Listing Manager – Setup Listing Categories. Manage listing posts.
Banners – For Advertising.
Campaigns– For Advertising.
Users – Further down the WP Dashboard, for me it is below WP Plugins Tabs.
Overview
Download Reports.
Check For Updates.
Design Setup – Customize and Child Themes.
The customization of colors, logo, menu, navigation, plus Page Builder and child themes.
Design Setup Options – WP Dashboard Options
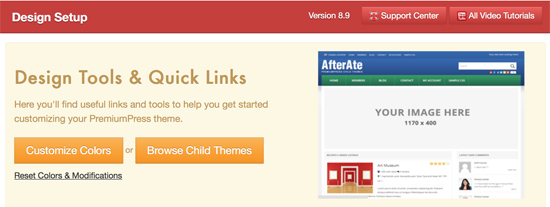
Design Setup – Design Tools and Quick Links.
Color Tool – Quick link to Color Tool. (Advanced version of WP Theme Customization).
Child Themes – See selection of PremiumPress child themes and download them.
Create Child Themes – Create a child them from main theme, or create other child themes.
Design Setup (Same as Dashboard Options.)
- Color Tool – Customize Color is an advanced version of the WordPress Appearance / Theme Customization panel.
- Header – Text or Logo, but not both.
- Background – Color or Image, but not both.
- Panel Colors – Refers to the Sidebar.
- Child Themes – Browse for PremiumPress Child Themes under Design Setup.
- Home Page – “Customize” option (the “green button”) only deletes some block sections, to actually customize, use the PremiumPress Page Builder.
True Customized Home Page – First create a “new” Page in WordPress, then select to use it under the Design Setup / Home Page / View Home Page drop down menu to find the newly created page. - Page Builder Plugin – Customize the newly created Home Page – To use Page Builder – It has to be installed by clicking the button at the top right at Design Setup and activated like any other plugin. Using Page Builder I was able to re-order the content, such as putting the map first. It allows creating a page from scratch or customizing an existing theme. – Page Builder reminds me of frames, it only allowed me to change the content area of my website, such as the order of the block sections, it does not appear to manage the header, footer or sidebar areas.
Theme Setup.
Setup and configure core elements and objects. The guts of the website, the listing and/or membership settings, plus the map, user and email settings. Also, advertising and language settings.
Theme Setup – WP Dashboard Options
Theme Setup
Language Setup
Email Setup
User Setup
Listing Setup
Advertising Setup
Toolbox
Plugins
Only made notes for #1 Theme Setup and #5 Listing Setup, the rest are or pretty self-explanatory or I am not using them.
#1 Theme Setup Options
Options to adjust the Header, Top and Main Menus.
Layout of the theme, Custom CSS input, and social sharing.
General – Core Page & Button Links – Logo – Navigation
Page Setup – Layout of the other pages (other than the Home Page).
Content Setup – Mobile – Map – Listing Image – Google Analytics – AddThis Social.
Search Setup – Advanced Search Fields.
User Setup
a. General – Additional Notes:
Adjust the Header to full width logo, or logo combined with options such as, search box, advertising area, menu, and text. – Adjust layout for Menus and Breadcrumbs. – Adjust Footer column layout. – Option to use the full width of the website or a boxed style width.
d. Search Setup – Additional Notes:
Advanced Search – Setting up what is “displayed” as search options to site visitors. Advanced Search goes beyond the basic Keyword Search and allows specific terms to be setup for site visitors to select from.
The Search Box can be setup in the content area and/or as a widget in the sidebar.
Create the Custom Search Fields in: Theme Setup / Search Setup / Add New Field.
Can “Add New Field” or “Taxomony” and can group search field options.
Advanced Search display can be set up as text box, drop down menu, radio button, etc.
Returned Values: Like = Partial – Example: tea will return, tea leaves, iced tea, tea bags, etc.
Heading: Field type / Select = Drop down menu of Custom Fields. Setup using “Heading” and can group fields. Display can be individual options or multiple selection option.
Important, the Database key is the PHP code to sort by, keep it simple and to one word or combined word. (Only alpha-numeric and underscore.)
The short code is: [ADVANCEDSEARCH]
Country, City, State and Zip Code are already created in the Directory theme. (User / Linked)
Can create “Custom Fields” in the Listings Setup that can be added to Advanced Search Box.
(12 minutes into Search Setup video, also see video “Custom Fields”.)
Theme Setup / Listing Setup / Custom Fields / Custom Field New
Must have at least one entry to be visible in a search result. (Go to Listing Manager.)
Remember, the Database key is the PHP code to sort by, keep it simple and to one word or combined word. (Only alpha-numeric and underscore.)
e. User Setup – Additional Notes:
Most is self-explanatory, but important, can add new User Question Fields.
Can require security code question for registration.
Create New Fields for User Questions, like phone number, age range, business type, etc.
Can add a text note to Users.
#5 Listing Setup Options
Listing Packages and Membership Subscriptions. Can have items or services for sale, listing duration times, and can restrict users to certain areas of a website using membership. Can Create Custom Fields for Listings. – Display Caption: Puts Header to separate fields. – Can change display order of Listing questions.
*Settings – Pricing Table. – “Visitor Submissions” to make visitors register to submit a listing.
*Custom Fields – Must have at least one entry to be visible in a search result. (Go to Listing Manager.) – Remember, the Database key is the PHP code to sort by, keep it simple and to one word or combined word. (Only alpha-numeric and underscore.)
*Listing Packages – Can Hide packages. – Can have Enhancement options. – Can transfer users to different packages if needed.
*Membership Packages – Package listing options – Can restriction packages to certain pages (found at the bottom of a created page – “Page Access”). Can hide package. Can transfer users to different packages if needed.
Listing Packages & Memberships are stand alone options, but can be used together.
Listings are single use for selling one item or service. Single price to list a single item.
*Listing – Can have several “Listings Packages” but each one is for a single item or service.
Membership are subscriptions and can have a single use or sell multiple “listing” options.
*Memberships – Can have several “Membership Subscriptions” and each one can have more than one “Listing Package” associated with each membership. Can submit multiple listings depending on membership design.
Example:
“Listing Packages”.
Ad for hotel.
Ad for event.
Ad for restaurant.
Membership Subscription
Level 1 – #1 Listing Package
Level 2 – #1 & #2 Listing Packages
Leverl 3 – #1 & #2 & #3 Listing Package.
Advertising Setup
Order Manager
Order Manager
Payment Gateways
Coupon Codes
Email Setup
Can install sample email templates. – Setup sent-from email information. – Manage mailing list – Use Widget to place Join Mailing List form.
Listing Manager
Setup Listing Categories and Manage Listing Posts.
#3 Additional Setup notes:
1) Home Page using Page Builder Plugin. I am still not clear on Page Builder setup. Does not appear to follow the theme. There was an option to use a theme page, which I did and modified it, but there was no sidebar. So I tried to add a sidebar, in the Page Builder program, I selected the columns icon and selected the image that showed a side bar. Then to actually install a sidebar area – I added an “Object” / MISC / Widget area. But then I ended up with a mess. I think it would be better to not use a theme, just the Page Builder.
2) The map needs at least 2 real locations listed to work properly. Without the two locations marked, the map might appear scrolled out and just a big, brown blank area.
3) Changes User’s Information.
a.) Change Listing Package for User.
Listing Manager – Select Post / Next page scroll down – just under the text box area / Listing Detail / to the right – Listing Package dropdown.
b.) Change User Role or Delete User.
Theme Setup / User Setup – On the right, green button “Manager Users”.
4) Advanced Search Field. (widget & shortcode – [advancedsearch]
Theme Setup / Search Setup – Must have 1 entry to be able to see.
Keyword – Taxonomy. Options: Listing, Pages, Blog Posts.
5) Membership verses Listing Packages.
After testing, and even trying “Hiding” membership packages, “Show On/Off” on Submisssion – on Regisitration, and other things. This is what I came up with.
*I can have membership packages.
*I can have listing packages.
*I can have membership packages linked to listing packages.
*But I can NOT have membership packages, and unlinked listing packages at the same time.
From my testing, listing packages must be linked to membership packages or used stand-alone with no membership packages. The registration process would not allow my test signups to select a free membership package – linked to a free listing package, and then later select from a different option of listing packages, kind of like an upgrade. The listing packages would be visible, but not actually available, I could click on the listing packages, but the additional features were not there.
6) From testing and asking on the Forum, it appears that Categories can not be placed in alphabetic order, the Categories’ order is by which Category has the most listings.
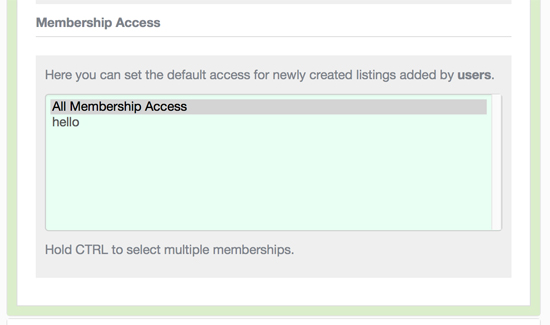
7) Membership Access – Here you can set the default access for newly created listings added by users. This option is not available unless there is a Membership Package and to my understanding the Membership Package can be deleted after the Access it set.
Theme Setup / Listing Setup / Membership Packages. Create a Membership Package. Set the Membership Access – Theme Setup / Listing Setup / Settings / Category & Membership Access. At the bottom there is a new option now available: “Membership Access – Here you can set the default access for newly created listings added by users.”
So these are my notes and I hope they help you.
My Story
My misadventures of installing and setting up PremiumPress Directory Theme.
I made some errors when I installed PremiumPress. Perhaps my sharing will prevent you from making the same mistakes.
My Big Errors
My First Installation of PremiumPress Directory Theme.
First, my WordPress site was already installed and loaded with stuff. Ultimatium Theme, Web2.0, GeoTheme, GeoDirectory, SiteOrigin stuff, CSSHero, plus loads more plugins and themes. Now I am not totally without a brain, I did turn off all of the plugins, but still…
Second, when I installed PremiumPress Directory there was a “Hosting Check – Pre-Installation” test. Green was good, red was failed. When I ran the test all but 2 passed and were marked with green dots. I was so anxious to try the Directory Theme, I figured what the heck, that looked like enough green, I wanted to see my new website now! and proceeded on with the install. 🙁
There were two errors noted with a red dot under “Hosting Check – Pre-Installation”:
#1 – Display PHP Errors – On (mine were Off).
#2 – Max Execution Time – 100 or more seconds (mine was 30).
Third, I wanted to compare Directory Theme and Business Directory Theme and loaded them both. Directory Theme installed, but with Business Directory Theme, I got an error, it loaded the theme icon, but I could not open Business Directory Theme. So I moved on with Directory Theme.
At first, using Directory Theme, my website seemed to be working, along with a couple of child themes from the “Browse Child Theme” link on my website, but not for long.
Fourth, when installing child themes, the PremiumPress website showed about 60 themes available for Directory, but with the Directory installed and using the find child theme option inside the Directory Theme, only about 30 child themes showed to be available. So I threw caution to the wind and I proceeded to go to the PremiumPress website and download two child themes I wanted and then uploaded them both to my website. The upload for each theme showed as a failure, but yet they appeared to be installed. Hum???
Are you getting the idea of how many mistakes I made. – LOL – I was accumulating errors and then they finally caught up with me.
When I tried to install one of the downloaded/error child themes, my site crashed. From there forward, each time I tried to activate a theme, it would have the remains of the previous theme overrunning the newly activated theme. In frustration I resorted to the PremiumPress forum, first searching the forum, and then I tried to find someone to help me. While I had some replies from very nice people, they didn’t seem to get my dilemma. I was frustrated, because this was not the first directory theme/plugin I had tired, so I was also frustrated by past experiences. I was impatient, I had been working on this new PremiumPress Directory Theme for a couple of hours, why was it not perfect by now. And I was in denial about my accumulated errors.
I am reminded of one of my favorite quotes from the Movie “Young Sherlock Holmes”:
[Sherlock’s attempting to play the violin]
Sherlock Holmes: I should’ve mastered the damn thing by now.
John Watson: How long have you been playing?
Sherlock Holmes: Three day.
In my frustration I wrote to the service department, and by the way, they did respond and offer help. But by the next day I had calmed down enough to see that while I did not understand some of the themes not installing, perhaps I had not given the program a fair chance. So I decided to start over and when I mean start over I mean start from scratch. So I grabbed what I wanted to save from my website. I downloaded the few media and blog articles that I had, and made some notes about pages and categories I wanted, and then I called my hosting service, JustHost, to have my site wiped clean.
The JustHost rep was great! He listened patiently while I explained what happened, I wanted him to understand why I wanted my site re-set. And he listened while I explained my frustration with past and present trials to find my perfect directory theme. And when I finished, he got right to work. He kindly placed my site in a folder, just incase I ever wanted to retrieve it, he said; I didn’t ever want to look at it again, but I just said fine and thank you. LOL Then he wiped my site clean, re-installed the basics of a new hosted website, and then he kindly re-installed WordPress for me, perhaps because I am a long time customer and have several websites and domain names with JustHost, or maybe he felt sorry for me. LOL – Now installing WordPress is an simple matter, but with my level of frustration, he probably saved me from a silly error, so thank you JustHost Rep, thank you!

My Second Installation of PremiumPress Directory Theme.
Now with my clean hosted website, and a fresh install of WordPress, I was ready to begin again.
My decision – I was only going to install PremiumPress Directory Theme. Business Directory and Directory Themes seem very similar. I really have not been able to discern the difference between the two, even after asking on the PremiumPress forum. And since Business Directory refused to install on my prior attempt, I decided to go with what seemed to work last time, Directory Theme.
So I installed Directory Theme and activated it, and then…
I already forgot what I needed to do next. LOL
I looked at my WordPress Dashboard and no Directory theme options. Hum… So I went to the PremiumPress video tutorial and there is was, the video pointed out that there is an “Installation” option in the WordPress Dashboard at the top, just under JetPack on my Dashboard.
Installation Video:
https://www.youtube.com/watch?v=OPCVlrkmYCU
Well, as with my first attempt to install, I came up with the same two install errors under “Hosting Check – Pre-Installation”, Display PHP Errors – On (mine were Off) and Max Execution Time – 100 or more seconds (mine was 30). No skipping the correct procedure this time. I called JustHost and explained the errors that I needed adjusting, and no problem, in a couple of minutes he had made the necessary changes, to the PHP, and gave me 120 second setting for execution time. Note that the changes did not appear when I refreshed the install page, but the JustHost Rep assured me they were good, so I proceeded on with my install of PremiumPress Directory Theme.

Worked like a charm, now I had the Directory Theme installed and the Directory Theme options appeared in my WordPress Dashboard sidebar.
Whoo! Sign of relief.
Next I downloaded a couple of child themes, this time I stayed with the 30 something child themes that are available from my installed PremiumPress Directory Theme on my website, available via the “Child Themes” options under “Design Setup”. I do not pretend to know why PremiumPress shows about 60 themes available on their website, but on my website there are only about half that number available, but I decided to stay safe this time around and only go with the themes available via my website.
Whoo! Again. Child themes installed and working, no craziness this time.
A quick word about child themes. Most of you probably know about child themes, but for those who do not, child themes are extremely important when setting up a WordPress website. You know the saying, don’t leave home without it. Well, to my mind, don’t run a WordPress site without a child theme. Why is it so important. A child theme is a duplicate of your main theme, from my understanding – not the content, but theme. If you make changes to your themes code, like CSS changes to styles for example, the child theme remembers these changes. Then if your main theme is ever upgraded with a newer version, your child theme will hold your changes so you don’t lose them. Now you think, I don’t know CSS, I don’t need to make changes, well maybe not now, but some day you might and it is better to have the child theme in place than not. I just always create a child theme, even for the simplest of sites. Don’t make creating a child theme hard, PremiumPress has child themes available, and they have tutorials for making your own child theme, also, there are free plugins that can easily make a child theme from most any theme. SiteOrigin has a child themes maker.
That said about child themes, let’s move on.
Okay, I said earlier that I wasn’t brainless, well maybe I am wrong, because my impatience got the best of me – again! I just had to do a bit of a design setup, before re-watching the setup videos, so I could “feel” my website, so I changed some colors and added my logo. My logo is a full width logo, but when I added it, the logo shrunk and was pushed to the left. Frustration jumped up and ran all over me again, and I popped out to the PremiumPress forum to see what code was required to make my logo full width. (Note I was doing this wrong, but I will explain the correct way in a minute.) After some searching, I finally found the code to make my logo full width (not needed), so I added the code to the CSS Editor and it worked, but then I had a big space under my logo and the logo was not centered, so back to the PremiumPress forum to search for that solution, and I posted a comment asking for help. Unable to find the solution and while waiting for an answer to my question, I decided to take a look around some of the setup options. – Whoo – hold the horses, what’s this, an option to make a logo full width, wait a minute I remember seeing this in one of the PremiumPress video tutorials. I forgot! So I removed the un-needed CSS code that I had added to the CSS Editor, selected the PremiumPress option to “make logo full width” and YES, the logo was full width, centered, and no big, ugly space under my logo. Perfect! I went back to the forum and posted – “Never Mind” and explained my silly error. There is no need to make things harder than they are, but I was sure trying because the correct option was there all along.
The full logo option is under Theme Setup / General / Navigation (Don’t ask me why it’s there.)
My next move was to go in and start selecting my preferences and options. Remember there are two sets of preferences to setup – WordPress and PremiumPress. For WordPress look to the bottom of the Dashboard and find “Settings”. Most of the “Appearance” settings normally done with WordPress will be done via the PremiumPress Design Setup. If you do not know WordPress, HERE is some information and links to videos, you should spend a few days learning WordPress before attempting to setup PremiumPress.
After I finished my WordPress setup, I began with PremiumPress options. At first I was booking right along, but the further I went, the more I realized how much I had forgotten from watching the tutorial video a few days before. PS – I have other work, so this initial process actually spanned several days. With this revolution of my memory loss – LOL – I went back and re-watched the PremiumPress video setup tutorials for the things I needed to do. This time I made notes. Ha!
A Note About the Help Forum
The PremiumPress Help Forum is good. At first I ran into rude and unhelpful, but I continued to ask questions and I was rewarded with meeting some kind, helpful people, and even made a new friend. So hang in there and keep asking questions. Also the support help is good, not immediate, of course, but usually within 12-24 hours. I gather they are in a different time zone.
I sincerely hope that along with the forum and support, my notes will help. I am sharing my notes online, so maybe others may find some answers among my experiences.
Plugins to consider:
http://www.premiumpress.com/plugins/?pluginp=1
PremiumPress Page Builder
Pricing Table Plugin
Terms and Conditions
Revolution Slider Plugin
TinyMCE Editor & Black Studio TinyMCE (More content styling options)
WordFence (Security)
A CSS Editor (To edit CSS code)
All-in-One WP Migration (Or some other Backup Tool)
Amazon Import Tool
eBay Import Tool

